Organizing students into groups is a simple way to streamline scheduling for both one-time and recurring sessions. Groups save time while still giving you the flexibility to invite individual students who are not part of the group when needed.
Accessing Students and Groups
Navigate to the Students & Groups tab. On the Students tab, you’ll see all students assigned to your account. Select a student’s name to view their profile in the reading pane.
Creating a New Group
1. Select the Groups tab.
2. Click the + Add Group button located under the Find a student search bar.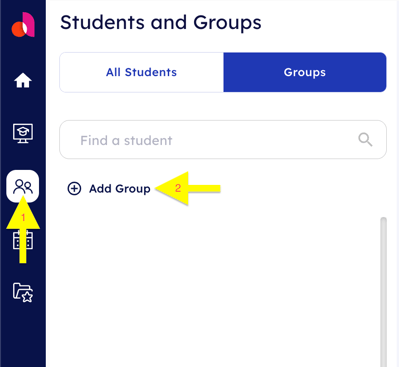
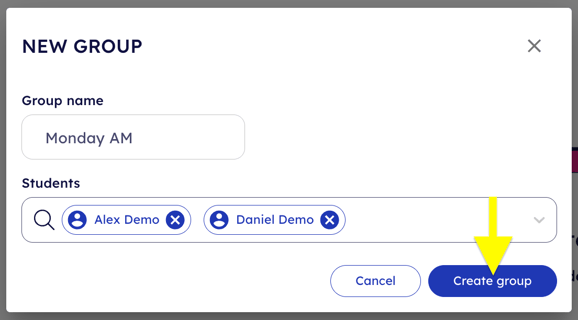
3. Enter a clear, easy-to-remember name for your group.
4. Add students to the group by:
- Selecting their names from the dropdown list, or
- Searching for them individually using the search bar.
5. After adding all students, click the blue Create Group button.
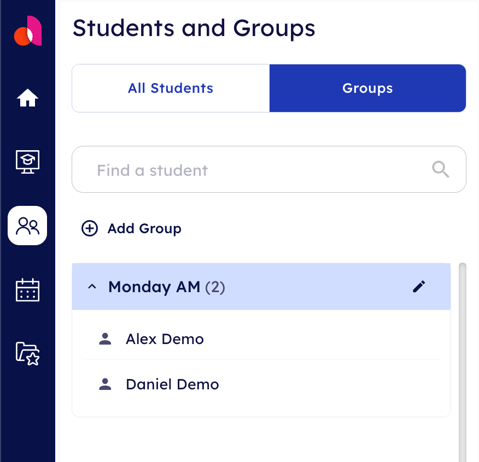
Your new group will now appear in your list of groups.
Using Groups for Scheduling
Once created, groups can be assigned to sessions directly from your calendar, making it easy to schedule services for multiple students at once. Learn how to schedule sessions on your calendar.
You’re all set – you’ve successfully created your first group!